Crown Molding Q&A: Matching Crown Molding Profiles Up the Rake
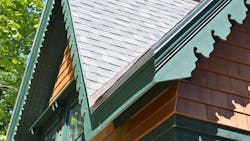
I got a question from an old carpenter friend of mine about exterior crown molding angles at the eave/rake corner. I've done this a thousand times, but it is always two or three years apart. As I get older, it is harder for me to remember how I pulled it off the last time...
His question went something like this:
Q: What is the miter angle for joining crown molding between the rake and the eave?
A similar situation happens at the top of a broken pediment (drawing above), where the crown molding returns to the wall before intersecting with its counterpart on the other side.
My friend said that he had Googled it—which would have been my first answer to him—he told me that he found a ton of information from SBE Builders, in Discovery Bay, California. This method seemed to be a lot more complicated than he remembered ever having to do.
I told him I'd look into it.
A: Use two crown molding profiles or eliminate the plumb cut
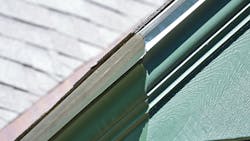
As crown molding comes down the rake, a plumb cut is longer across the width of the board than a straight cut, so the two profiles will not line up accurately.
For the same reason that the fascia coming down the rake mitered into the fascia running along the eaves has a longer cut: because a hypotenuse is longer than the other two sides of a right triangle.
On fascia, you can clip the bottom corner, and no one will notice the discrepancy—because the profile of fascia is flat.
Crown molding rarely has a flat profile, so even if you clip the bottom corner, none of the humps, bumps, and curves will line up at the miter.
You won't look like a dope carpenter; you will just look like a dope.
Two solutions to matching crown moldings on a rake
After looking into it. What I have found is that there are a couple of ways to do it:
- Use multiple molding profiles (with the same projection, but different drops) to align the curves at the different angles
- Eliminate the plumb cut at the bottom in favor of squaring the crown molding and fascia to the eave. Now, the miter is a simple task because both the fascia and crown are square to the rake rather than plumb to the earth.
Gary has a couple of articles on the topic, one about each approach, and seems to come down on the side of the second method as being traditional and practical. A video from Gary's site, This Is Carpentry, describes the problem and the first solution below.
To get the voice of an actual historical expert into this conversation, I asked Brent Hull, who owns of Hull Historical, specializing in historical moldings and restoration. Brent was the star of a new History Chanel series called Lone Star Restoration. He also has a great dog, Romeo, but that is beside the point.
Brent told me that using two different profiles is the traditional method.
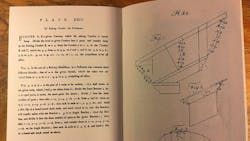
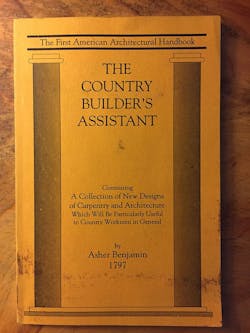
"One of Asher Benjamin’s first books was titled “Country Builder’s Assistant” (1797) which was written for the country builder who wanted to build more sophisticated buildings.
I think the title and its popularity speaks to the level and quality of building in America before the 19th century. It was spotty. Most building was unsophisticated.
Thomas Jefferson wrote about the poor quality of building in the early stages of his building career. He made it his mission to improve building quality in Virginia.
He educated a great number of craftsmen, training them most commonly with Palladio, which he called his bible for building.
As we move into the latter half of the 19th century, manufacturers began to offer raking moldings for order. I have a molding catalog (really more of a flyer) from the 1870’s that advertises a crown molding along with a corresponding or matching raking crown.
I presume, during this period, you could order the crown and raking cornice from molding yards. This makes sense as it must have been a fairly common need.
Today, the bigger challenge we face is that cornices and returns are ugly because the craftsman doesn’t know either method. In Steven Mouzon’s book on Traditional Details he highlights the wrong and right way for doing returns.
Some of the wrong ways are quite bad, and sadly common."
This is Carpentry video about defining the mating angle for plumb cuts:
In the end, my friend didn't have enough time to wait for me to intellectualize with these two, so he came up with a third method: rolling the crown up—decreasing the projection—to match the rake.
It is cheating, but it is also 25 feet above the ground. It is a butt joint, not a miter, but ...
"...it looks great from here!"
It is a butt joint.


