New Entry Door Trim Using Old Corbels
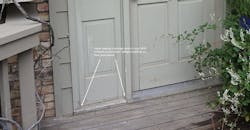
My client found a matching pair of architectural corbels at an antique dealer some years back, and held on to them for inclusion into her house at some point. When her front door finally gave way to years of wear, tear, and water, she asked if I could incorporate the two corbels into new trim work for a new door.
Water had been seeping through joints where the jambs met the sill and soaking into unprotected wood beneath. Over time this wetting caused some of the floor and joists around this entry door to rot.
Luckily the damage was relatively minimal and not a structural concern. Using a flat bar and vacuum cleaner I removed an old deteriorated piece of Masonite siding buried underneath the door threshold.
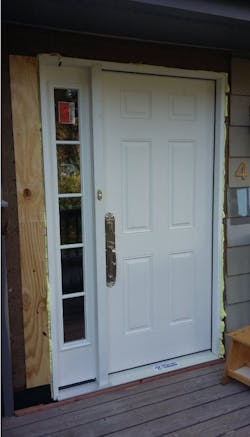
By cleaning the area well and removing all loose and deteriorated wood I was able to proceed with new door installation by adding a layer of peel and stick membrane and facing it out with a new redwood piece to support the new threshold.
To provide a solid level support for the new door sill I used a staggered stacked layer of a heavy dense water shield membrane to gain about 3/16 inch to nothing across the opening to level the subfloor.
Since the existing exterior sheathing was half inch fuzz board from the late seventies and had to be infilled for the new, narrower door frame and lacked any weather barrier, I used a wide strip of peel and stick membrane to cover the exposed sheathing before installing the new trim work.
Building with bytes... before boards
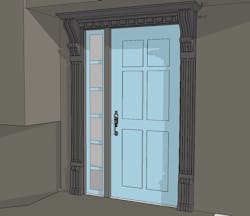
Designing the trim work is the exact kind of situation where SketchUp rocks for visualizing various renditions of a millwork design superimposed on an actual photo of the house utilizing the photo match feature.
With an antique corbel in hand I was able to easily recreate a digital duplicate in SketchUp. With a digital Corbel model and actual site measurements of the new door jamb it was a matter of creating various profiles and configurations for additional vertical and horizontal Millwork members.
I brought in a dentil detail from other millwork in the house, and after comparing a handful of variations, came up with a final design that (IMHO) seemed a natural extension of the original Corbel Style.
The new millwork design/configuration was presented to the client for approval and with that I was able to go to the shop and recreate the pieces in analog form from the Digital model.
The trick in fitting the Millwork assembly to variables on the job site was in creating a void behind the crown molding which was easily scribed to the bulging and uneven soffit panel on-site.
By coordinating with a conscientious painter who back primed and painted the entire assembly before it was installed and applied a face coat of paint after final filling and caulking, we were able to assure no water would be seeping into this new assembly for many years to come.
—Matt Jackson is a master carpenter, remodeler, SketchUp Wiz, YouTuber, and contributing editor to ProTradeCraft. He lives and works in Rapid City, South Dakota.


