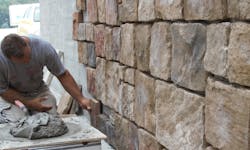
Manufactured Stone Veneer: Five Pro Tips for Expert Installation
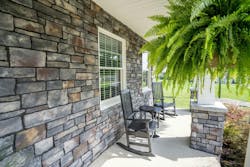
For homeowner return on investment, you just can’t beat manufactured stone. This versatile product can be used for exterior cladding, outdoor living spaces, and indoor accents, and is consistently rated for adding curb appeal and resale value to a home remodel or new build.
Manufactured stone cladding adds a beautiful boost to cottage, farmhouse, manor, and modern architectural styles and when installed properly, provides a durable, low maintenance exterior.
Here are five pro tips that will help with a smooth and efficient stone installation:
Plan your Pattern: Position the stones out on the ground before installation, so you can arrange them in a pleasing pattern and ensure you have enough material. Mix different sizes, textures, and colors for an organic look, and choose stones from different boxes to get a blend of profiles. This step also allows you to see which stones may need trimming, so have your nippers, hatchet, hammer, or circular saw handy.
Prepare your Work Site: Survey your work area and make sure there are no safety hazards, debris, or clutter, and shut down any electric supply. Make sure you have all your supplies and tools easily accessible. Lastly, wear the proper PPE for the job, including safety glasses, ear plugs, steel toe boots, and waterproof gloves.
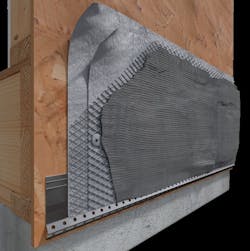
Prepare the Exterior Surface: Start with a layer or two of building paper, followed by application of a code-approved, water-resistant barrier, such as 18-gauge woven wire mesh or self-furring galvanized metal lathe. Apply flashing at all through-wall penetrations, windows, doors, roof line intersections, and water spigots, and install weep screen materials for drainage at final grade.
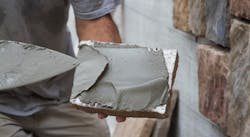
Begin the Installation: Using a 12” trowel, spread mortar 1/2” to 5/8” thick over the metal barrier material; after it is dry, scratch or score the surface horizontally to create a rough coat that will ensure a good bond.
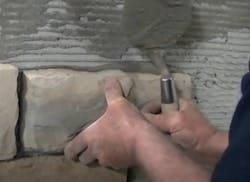
Start applying stone at the outside corners; alternate long and short legs as you go up the corner, for a staggered effect. Next apply inside corners, placing stones so they dovetail together. Now begin placing the flat stones, working from the inside out. Install stone no closer than 4” to final grade and 2” to hard surfaces such as a sidewalk or driveway. When applying mortar, spread thoroughly on the back and sides of each stone.
When placing the stone, wiggle to get it into position, then press to adhere. Strike off the excess mortar that may squeeze out. Check your level plumb regularly to ensure consistent level rows, and cover 5 sq. ft. of surface area at a time.
Grouting Techniques: For grouting the joints between the stones, place your grouting mixture in a plastic or nylon grout bag. Fill to 8 inches from the top and twist; snip off the tip of the bag to about the size of a quarter. Squeeze grout into the joints, filling until it is flush with the stone. When firm, use a wooden striking tool to remove excess and even out surface. Next, use a plastic bristle brush to gently loosen grout particles.
Colored grout can give the finished wall a complementary or contrasting look from the stone, or other features such as the siding or roof. Use ProVia’s Grout Color Visualizer to see how the finished wall will look. Grout texture can provide visual impact as well: a smooth raked finish allows the stone to be the focal point, while a rough finish or over-grouting gives a rustic appearance.
For more detailed instructions and tips on stone installation, be sure to watch ProVia’s Stone Installation video series.
Sponsored by:
